Tuesday, December 26, 2006

Silvia´s mother-in-law's bread recipe

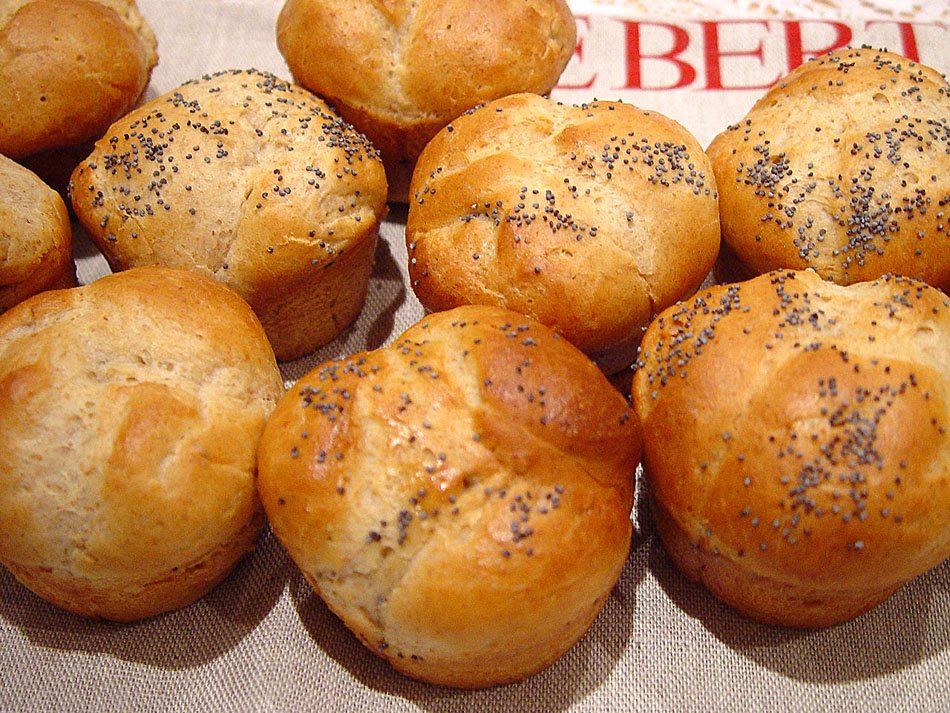
The original recipe for this bread was taken from a Brazilian blog called Doce Casinha – click here if you wish to visit it. A couple of things made me pick this recipe: the first one was the lovely description given by Silvia, the author of the blog; the second was the fact that I had bought some fresh yeast at the supermarket and was looking for a recipe. I have to add that I love when I am home in Brazil and I can easily buy fresh yest at any supermarket. In the UK we always need to go to a local supermarket that is big enough to have its own bakery so that you can ask for some. I do not like using dried yeast.

Back to Silvia´s recipe, she got it from her mother-in-law, and in the post she comments on how she ended up veering out of her diet because of it. The bread is meant to be irresistible.

I loved the dough – it has to be said. It came together very quickly. I do have to admit to not having used the same method as Silvia to prepare the dough. I use a method learnt in a bread making course given by Richard Bertinnet. In it all the dry ingredients are put in one bowl – each one in its little corner. The salt (and sugar when used) are covered with a bit of flour so that they do not get in contact with the fresh yeast before it is the right time. The fresh yeast is crumbled in its little corner, away from salt (and sugar) and complety mixed with the flour using the hands. Once it is all incorporated you proceed to giving the dry ingredients a mix before adding the ‘wet’ ingredients to the mixture. Using a spatula you proceed to mixing all the ingredients in circular movements until dry and wet are all integrated. From there onwards the process is the same: turn the mixture on to a lightly floured surface and then you know the rest. Richard’s method has never failed me. However, I will say that you should stick to a method that you are familiar with.

As for the filling I just wanted to add that despite the ingredients listed you can use your own variation. You will be surprised with how light this dough is. Already a favorite.


INGREDIENTS

Dough
:

- 50 g fresh yeast

- 2 cups of water
- 1 kg bread flour
- 1 tablespoon sugar

- ½ teaspoon salt

- 3 eggs
- 1 cup vegetable oil


Filling:

aproximately 300g ham e

aproximately 300g de cheddar

finely chopped onions

finely chopped tomatoes – no seeds

chopped parsley - or coriander if you prefer

a bit of salted butter

Preparing the dough:

1. Dissolve the yeast in 2 cups tepid water.

2. Put the flour, sugar and salt in a bowl and mix the ingredients.

3. Add the dissolved yeast, oil and eggs and mix all the ingredients until you get an even mixture.

4. Transfer it to a lightly floured surface and knead it for about 4 minutes. The mixture will come together very quickly. This is na excellent dough.

6. Put it in a bowl, cover and leave it to rest in a warm corner of your kitchen, away from drafts.

Now get busy sorting out the ingredients for the filling:

1. Chop the ham and the cheese and put it in a bowl

2. Add the onions, tomatoes and chopped parsley

3. Season it very lightly if you wish. Reserve.

Have a cup of tea, sort out the baking tray. If you are going to use muffin tins get them out of the cupboard and give them a nice wipe. No fluf in your bread!

When the dough has doubled in size get it back a floured working surface and knead it gently one more time. You can divide the dough in 2 as it is big enough.

You can shape your dough in many different ways. The original recipe maker opens it up like an A4 sheet. Some butter is spread evenly on it and the filling follows. Try to keep the filling in the center leaving a bit of room on the sides. Roll it up as if you preparing a swiss roll. Do exactly the same to the other half of dough if you have split it into two parts. Put both rolls on trays, cover them and return them to the cosy kitchen corner previously used. They will increase in size again – about ¾ of their original size.

Final stage:

When your dough has already been resting for 30 minutes of its last stage, turn the oven on – 200°C. The oven will be ready at approximately the same time as your dough. Just before you take it to the oven brush it with an egg wash mixture and sprinke it with dried oregano if you like the taste of it. You will love the smell that will take over your kitchen. Take the tray in and bake it for about 15 minutes. It should be golden when ready.

Leave it to cool before taking a bite. If you burn your tongue first you will not be able to fully appreciate the delicious flavour of this bread.

Monday, November 20, 2006

a delicious white cake with chocolate ganache

It has been quite a while since I posted a recipe here. Maintaining 3 blogs and the occasional post on a 4th one can be quite a challenge and my work load just did not help. I carried on cooking but physically only managed to post on the Portuguese version of Trembom. I do have to say that it is wonderful to be back here. Hopefully this time I will have no more interruptions – not very long ones any way.

To celebrate my return I have decided to share a cake that I baked for a lovely friend, Deb. She is now married to my very good friend Rob, whom I have worked with for a good few years now. She is as wonderful as he is. What a lovely couple. I couldn’t go to Deb’s surprise birthday party so when I was invited to have dinner with them I decided that the occasion asked for a lovely cake. I did try loads of different recipes – all equally nice. Some I had already baked before, others I wanted to have a go at. I am not the most decisive person. Up to the last minute I am thinking about another ‘possibility’. When I go out for a meal for instance, I keep changing my mind about my choice until the minute the waiter takes my order. Often it ends up being none of the ones I had already talked about.

So keeping up with tradition, on the very last minute I decided that the cake that I was going to bake was going to be a white cake. Even though I did know that Deb really likes chocolate I decided to go for a white cake with chocolate ganache as filling and icing. It would be not as sickening as a whole chocolate cake with chocolate trimmings as well.

The idea for the cake came from the blog Technicolor Kitchen. Patricia, who owns the blog, got the original recipe from Baking Sheet. See the original recipe here. As Patricia rightly said the cake is absolutely delicious. It is quite firm but also wonderfully light – no egg yolks, only egg whites. Plus it smells absolutely divine. The almond and vanilla essence combined transport you to a wonderful place – it tickles all your senses in my opinion. For the ganache I got a recipe from Pierre Herme ‘Chocolate Desserts’. It is great because it is not too sweet but it is chocolaty enough for the chocoholics to enjoy. If you wish a copy of the recipe just let me know and I will mail it to you.

I did still want to decorate the cake and I went for chocolate fingers, fencing it off, and chocolate flakes on top. I do have to say that I was quite proud of my achievement. I am not the most gifted person when it comes to cake decoration but perhaps there is hope for me.

Monday, July 24, 2006

Strawberry and Lime Cheesecake

I bought Sophie Grigson’s Country Kitchen a while ago. After seeing her on TV a few times – actually quite a lot, I decided to buy the book. For no special reason I only got to use it this weekend just gone. I fell in love with this strawberry cheesecake recipe and made sure that I got all the ingredients to try it over the weekend. I did consider using yogurt in order to make it a tad lighter but I had to drain it for a good eight hours and I didn’t organize myself enough. So in the end I decided to use the recipe as it is, and not to feel guilty about the extra calories. Instead I would enjoy every mouthful if it was worth it. It is one of those cheesecakes that don’t get cooked. You just need to let it set in the fridge. Lovely in a very hot day as nobody can stand the extra heat of the oven.

I loved the fact that we combine strawberry and lime as the two fruits seem to complement each other very well. I used a little bit more biscuit as I really love a crunchy base. In my opinion this cheesecake works well because it does not get too sweet – I did worry about it a bit. You can prepare a sauce to go with it but in my excitement to eat the cheesecake I confess to have forgotten all about it. Indulge.

For the base:

220g digestive biscuit/ tea biscuit

110g unsalted butter, melted

For the filling:

3 leaves gelatine

150 ml single (pouring) cream

300 g cream cheese

125 g caster sugar

Finely grated zest and juice of 2 limes

300 g ripe strawberries, hulled and chopped

150 ml double cream, whipped

Crush the biscuits finely, either using a food processor or putting the biscuits in a bag and crushing them with a rolling pin. How thin you crush them depends on how you like them. Pour the butter over the crumbs and mix it all until the biscuit crumbs are covered. I prefer to do that using my hands as opposed to a spoon.

Put some water in a baking tin, enough to cover the gelatine, and throw the gelatine in. Leave to soak for 5 minutes. In the mean time bring the single cream to the boil and the remove it from the heat. Squeeze each gelatine leaf to remove the excess water and throw it in the pan with the cream, stirring one by one. They will dissolve instantly. Leave to cool for a few minutes.

Put the cream cheese in a bowl with the sugar, half the lime zest and all the lime juice. Beat together until smooth and creamy. Mix in the single cream mixture and then the chopped strawberries. Next fold in the whipped cream. Now pour the whole lot into the tart tin and smooth down lightly. . Chill until set, then sprinkle with the remaining lime zest.

Sunday, July 23, 2006

Whole wheat, Oatmeal and Raisin Muffins

This is a delicious and very healthy breakfast muffin. There is so much goodness in one of these – loads of fibers, dried fruits, vitamin E, antioxidants. It is very filling as well. One of these plus my morning fruit and coffee keep me going for the morning.

Another great thing about it is that you can play with some of the ingredients. This time for instance I haven’t used dried cranberries as I had none. Instead I used dried figs. Did the same with the dates – used prunes instead. You can prepare the dried mixture the night before, in the morning put the oven on and whilst it heats up mix the wet ingredients with the dry ones. Leave the mixture for about 15 min – it allows the oats, wheat germ and bran flakes to soak up the liquid. I have made it without the resting time in the past and I did notice that the muffins weren’t as tender as they get when they rest.

If you use UK measuring cups it will be 240ml full cup, I used Australian size cups – 250 ml – greedy, I know.

1 cup whole wheat flour

¼ cup granulated sugar

¼ cup packed brown sugar

2 tablespoons untoasted wheat germ

2 tablespoons wheat bran

1 ½ teaspoons baking soda

1 teaspoon ground cinnamon

½ teaspoon salt

1 ½ cups quick cooking oats

1/3 cup chopped pitted dates

1/3 cup raisins

1/3 cup dried cranberries

1 cup buttermilk

¼ cup groundnut oil

1 teaspoon vanilla extract

1 large egg, lightly beaten

½ cup boiling water

Combine the flour and next 7 ingredients (through salt) in a large a bowl. Next step is to stir in the oats, dates, raisins and cranberries.

In a separate bowl mix the buttermilk, oil, vanilla extract and egg. Make a well in the center of the dry mixture and add the wet ingredients to it. The boiling water is the last ingredient to be added. Let the batter stand for 15 minutes.

Preheat the oven to 190˚C/ 375˚/ gas mark 5. Spoon the batter into cooking oil coated muffin trays. Bake for 20 minutes or until muffins spring back when touched. Remove the tin from the oven and get the muffins out of the tin immediately, moving them to a wire rack to cool.

Passion Fruit Ice Cream

I absolutely love passion fruit. In the summer I find that there is nothing more refreshing than passion fruit blended with water, loads of ice, a squeeze of lemon and a bit of sugar. Passion fruit ice cream is a luxurious refreshing treat.

I spent the whole week dreaming with this recipe. Couldn’t wait till my tiny freezer was empty enough to fit the ice cream maker. I finally managed to make room for it yesterday. I don’t consume ice cream only in the summer but it is much more welcome on a hot day. And it has been hot around here.

This ice cream is lovely, with a zesty touch to it. I used lime instead of lemon - no special reason other than the fact that I much prefer lime to lemon. Habit probably. And even though they cost 15p each I still buy more of them than the ordinary lemon.

The recipe can be found in Falling Cloudberries – A World of Family Recipes but I will also share it with you here. This book is full of wonderful recipes.

250 ml pouring cream (single cream)

250 ml milk

230g caster sugar (superfine)

Grated rind of 1 lemon

Juice of 2 small lemons

Pulp of 6 fresh passion fruit

Put the cream, milk and sugar in a bowl and stir until dissolved. Put the rest of the ingredients in and transfer it to the ice cream maker if you have one, following the manufacturer’s instructions.

If you don’t have an ice cream maker don’t despair. After dissolving the sugar in the mixture of cream and milk cover the bowl and put it in the freezer. After an hour, remove the bowl from the freezer and give an energetic whisk with a hand or electric whisk, then return the bowl to the freezer. Whisk again after a couple of hours, this time adding the lemon juice and rind and passion fruit pulp. Return it to the freezer. When it is nearly firm, give one last whisk, transfer it to a suitable freezing container with a lid and let it set in the freezer until it is firm.

Tuesday, July 11, 2006

Corn Cake


I cannot remember how long it had been since I had last eaten sweetcorn cake. Just taking a bite brought all these wonderful memories back. Memories of the month of June and all the fabulous celebrations that we have all over Brazil. All the lovely cakes - farm style cakes. Cakes with no fuss. Just delicious. Sweetcorn cake says ‘cup of coffee’, farmhouse kitchen, sitting at the table in the afternoon and spinning a really good yarn.
The ingredients are so Brazilian – not in their origin necessarily, but in their usage. Yellow cornmeal is a favourite with Brazilians when it comes to good, honest, Brazilian cakes. They can be baked together with bits of guava paste, with coconut milk, fennel seeds... Coconut milk is an ingredient that in Brazil is used mostly in cakes and desserts. We have one or a couple of typical savoury dishes which take coconut milk. Apart from those, it is always associated with sweet goods. Then we also have condensed milk. You would not believe how popular condensed milk is amongst Brazilians. It is used in cakes, in cocktails, in desserts. We call it popularly ‘the milk lady’. The reason being that when Nestlé started selling their goods in Brazil back in 1890, the condensed milk can had the picture of a milk lady,’ Condensed Milk – Milkmaid Brand’. The ladies of those days who were the ones to do the shopping, asked for the tin with the milk lady on it – Leite Moça. If my memory doesn’t betray me the tins in Brazil still have the lady on it.
Going back to the recipe, I got it from Clarice, my friend who runs the blog Pecado da Gula. I will eventually publish it on m blog about Brazilian food and will endeavour to tell a bit more about it – if you fancy a visit.
Click here to see the recipe.

Saturday, July 08, 2006

Courgette Flowers

Courgette flowers are not easy to find so even though I paid a small fortune for them I decided that it would be worth every penny - or so I hoped.These are from Holland. I bought them from a store at Borough Market in London. They are just so delicate and beautiful!!

Of all the recipes I came across I decided to use one by Australian chef Curtis Stone.

Ingredients

150ml balsamic vinegar
12 courgette flowers, attached to courgettes
groundnut oil, for deep frying

For the stuffing:
250g ricotta cheese
2 basil leaves, shredded
squeeze of lemon juice
50g freshly grated Parmesan cheese
salt and fresh ground black pepper

For the batter:
100g plain flour, plus extra for dusting
120ml fizzy mineral water

Preparation:

1. Pour the balsamic vinegar into a small saucepan and boil for a few minutes until reduced to a syrupy consistency. Set aside.

Mix together the ricotta, shredded basil leaves, lemon juice and Parmesan. Season with salt and pepper.

Trim the courgette flowers from the courgettes and shake free of any insects. Slice the courgettes in half lengthways and set aside. Carefully open the flowers and filll them with the ricotta mix. Be gentle as they are very delicate. I ended up using my fingers as even the smalles spoon i had - a tiny coffee spoon from home, proved not to be the best tool.Perhaps experience makes it better. Twist the end of the flower to keep the stuffing in place. To make the batter pour the water into a shallow dish and gradually whisk the flour through a sieve, making sure there are no lumps. The batter should have the consistency of thick pouring cream.

Pour enough oil into a high-sided frying pan to come to a level of about 3cm. Heat until very hot but not smoking. Roll the stuffed flowers and courgette halves in flour. Working in small batches, quickly dip them in the batter, swirling to coat, and then into the pan. Deep-fry for 1-2 minutes until the batter is crisp and golden. Put them on a dish lined with kitchen towel to drain the excess fat - if any. Place in a warm serving dish, sprinkle with grated Parmesan and drizzle with the balsamic vinegar.

I also used some of them to prepare some halibut I had in the fridge.It is a very simple and quick dish. If you cannot find the flowers it is ok to use very finely cut courgette strips.

halibut or sea bass

courgette flowers

olive oil to drizzle

sal and freshly ground black pepper


Heat the oven - 200oC. Line a baking dish with greaseproof paper and set aside.

Cut the fish in small pieces, put salt and pepper, and roll each one of them with strips of courgette flowers. You might need to use a tooth pick to keep the strips well attached to the fish. Put the pieces on a baking tray and drizzle with olive oil. Roast for aproximately 5 minutes. Let them reset for a couple of minutes before serving.

Click here if you wish to read the post in Portuguese.

Chickpea and Pomegranate dip with pitta crisps

Chickpeas, grão de bico, garbanzo. God bless the greeks, romans and egipcians who use to cultivate it a long time ago. And double blessed are the Portuguese and Spanish for spreading it around the world back in the old days. Chickpeas are so full of goodness – well beyond their wonderful flavour. They lower cholesterol, are rich in fibers, have a high level of protein and are low in calorie. The Spanish use them quite a lot in their diet. Good on them. I am a very big fan, and confess to sometimes overdoing it on the ‘nibbling ‘ front. For this dip you can leave the chillies out if you are not into spicy food. It goes really well accompanied by a good yarn with friends and a glass of your favourite wine.


6-8 Pitta bread

100ml extra-virgin olive oil plus extra for the crisp

1kg 200g Chickpeas

1 Lemon, juiced

2 red chillies, seeded and chopped** optional

1 clove garlic, crushed

2 tsp cumin seeds, toasted in a dry frying pan

1 small red onion, finely chopped

A small bunch mint or parsley, finely chopped

Pomegranate molasses thinned down with a bit of water

Heat the oven – 200oC/fan 180oC/gas 6. Cut the pitta into triangles and spread them on a baking sheet. Brush them with olive oil and bake for 7-8 minutes – until golden and crisp.

Put the chickpeas, 100ml olive oil, lemon juice, chilli and garlic in a food processor, season an pulse until crushed. Add the mint/parsley, red onion and cumin seed and pulse it some more. Adjust the seasoning. Drizzle with pomegranate syrup and serve with warm pitta crisps.


I also like having it with a leafy salad. I sometimes thin it down with a bit of olive oil.


Click here for the Portuguese version.

Tuna and Roasted Hazelnut Coleslaw

Traditional coleslaw is quite a lovely salad but it can become disgusting if people insist on adding loads of mayo to it. Because of that I very rarely eating the traditional thing unless I prepare it myself. What I really love about it is the crunchiness of the cabbage and the carrot which brings an additional sweetness to it. I do, however, love twists to old ‘favourites’ so this recipe was impossible to resist. Red onions add so much flavour to salads plus a beautiful shade of red/purple as well. I tend to buy good quality tuna for my salads where the tuna used is not fresh, and a brand I particularly like is Ortiz . Their tuna is delicious. I could never go back to the ordinary tuna from the supermarket once I tried this one. The roasted hazelnut add a nice nuttiness to the dish and goes very well indeed with the other ingredients. Toast some pitta bread to have it with.

4 tablespoons of mayonnaise

Juice of ½ lemon

Salt and black pepper

1 white cabbage

1 small red onion

Bunch of fresh flatleaf parsley , chopped

75g chopped roasted hazelnut

400g cans tuna steak in oil

Halve, core and finely shred 1 white cabbage, then put it in a salad bowl. Add 1 small red onion finely sliced the chopped fresh parsley and the chopped roasted hazelnuts. Toss everything. In a smaller bowl mix together the mayo and the lemon juice plus the seasoning. Throw it in the salad bowl and mix all the ingredients well. Drain the tuna steaks and add to the coleslaw, mixing gently. It is ready to be served.

Click here for the Portuguese Version

Monday, June 19, 2006

Stuffed Courgette Rolls


I first saw this recipe being prepared on a DVD that came with one of the magazines I subscribe. It was a teaser to the readers as it contained recipes of the then upcoming Gordon Ramsey’s book Sunday Lunch. He is so full of passion for food and very fresh ingredients that first and foremost I always feel like preparing anything he comes up with. In addition to that I found this recipe to be dead easy, with a lovely base – the courgette, and then the creaminess of the ricotta, the crunchiness of the pine nuts. I played the DVD again for a couple of times and then decided that I had found my dinner dish. This recipe is indeed very simple. As much as I am a big fan of Ramsey I do know my limitations. The balance and freshness of the ingredients is the key to success. You can prepare it as a starter or to nibble whilst drinking a glass of wine with friends. Create an occasion to prepare it if you must. Just don’t miss this opportunity.

I just would like to say that the number of courgettes that you might need will depend on the size of the ones you have. I would even dare suggest that you prepare ¾ first, and then depending on how much filling you have left slice some more. As you prepare these in advance there is no problem if you need to split it into stages.

4 small courgettes, trimmed

Olive oil, to oil and drizzle

250g ricotta

Juice of ½ lemon

Splash of extra virgin olive oil

Sea salt and freshly ground black pepper

Handful of basil leaves, chopped

50g pine nuts, toasted

Balsamic vinegar, to drizzle

Slice the courgettes lengthways, using a swivel vegetable peeler or a mandolin and select about 40 good strips. Place the courgette strips on an oiled tray and brush with olive oil. Season with salt and pepper and chill for 20 minutes.

Mix the ricotta with the lemon juice, extra virgin olive oil and seasoning to taste, then fold in the chopped basil and pine nuts. Place a small teaspoonful of ricotta mixture on one end of the courgette strip and roll up. Repeat to use up all the filling. Arrange the courgette cannelloni on a plate and grind over some black pepper. Drizzle with a little olive oil and balsamic vinegar and serve.

Sunday, June 18, 2006

Confessions in Groups of 5 Meme


Paz of The Cooking Adventures of Chef Paz has put an open invite for this Confessions in Groups of 5 meme. I have decided to join as well.

5 items in the freezer
1. Frozen Peas and spinach
2. Vanilla Ice Cream from Tesco's
3. Frozen Raspberries
4. Chicken breasts
5. Leg of Lamb

5 items in my closet
1. shoes
2. scarves
3. hair dryer
4. jewelery
5. belts

5 items in my (our) car (van)
1.Map of England
2. Brazilian music CDs
3.chewing gum
4.empty shopping bag
5.Halls Extra Strong

5 items in my purse
1. car keys
2. wallet
3. train pass
4. work pass
5. passport

5 Bloggers I tag for this meme
1. Karen
2. Clarice
3. Fran
4. Pille
5. Ana

Thanks, Paz!

Braised Chicken with Apple Sauce and Pitta-style Bread

Both these recipes are from an issue of Gourmet the magazine. For the bread I loved the fact that you could use the grill to get the bread ready. How great is that? The magazine adapted a recipe of a café in Terre Haute, Indiana (I think). The café is called George’s Downtown Café and Diner. The owner of the café, Albert is of Lebanese origin. This bread is great to have with hummus or any other spreads. I had it with some chicken in a caramelized sort of sauce which also had apples in it. It is wonderful to mop up the juices.

Another wonderful think about this bread is that whilst my chicken dish was cooking I got going with my dough. As the chicken got ready I was half way through cooking/grilling/baking my bread (not too sure which one is the right word). It was both wonderfully delicious and extremely satisfying to eat the bread. Strongly recommended.

Better-than-Pitta Grill Bread

2 cups (240 gm) all-purpose flour plus additional for dusting

1 teaspoon sugar

1 teaspoon salt

½ teaspoon fast-acting yeast (such as Fleischmann’s Rapid Rise yeast – I used dried yeast as I couldn’t find the Fleischmann’s one)

¼ (60 ml) cup plus 1 tablespoon warm water (105- 115o~F)

¼ (60 ml) cup canola or vegetable oil

1 tablespoon beaten egg

Lightly oiled ridged grill pan, cast-iron skillet, or griddle

Whisk together flour, sugar, salt and yeast in a bowl until combined. Whisk together water, oil and egg in another bowl until combined well, then stir into flour mixture until a shaggy dough forms. Turn out dough onto a lightly floured surface and knead, working in just enough additional flour to keep dough from sticking – but please avoid that as when mixing dough it is normal that it sticks at first but gets better later. The dough will not be smooth. Form dough into a ball and put in an oiled bowl, turning to coat, then let rest in bowl, uncovered, in a warm draft-free place for 10 minutes.

Cut dough into 10 pieces and form each into a ball. Working with 1 piece at a time, flatten balls, then roll out into thin rounds (very thin) on lightly floured surface with a lightly floured rolling pin.

Preheat grill pan or skillet over moderately high heat just until smoking, then reduce heat to moderate and grill bread rounds, 1 at a time, turning once, until marks appear and bread is cooked through, about 2 minutes. Keep breads warm, wrapped in a cloth napkin.

Braised Chicken with Apples and Sage

8 chicken thighs with skin and bones

1 ¼ teaspoon of salt

½ teaspoon black pepper

1 tablespoon olive oil

1 tablespoon unsalted butter

1 tablespoon packed brown sugar

2 apples (preferably Gala) peeled, cored and cut into ½-inch thick wedges

½ cup chopped shallots

2/3 cup chicken stock

1 teaspoon cider vinegar

½ teaspoon chopped fresh sage

Pat chicken dry and sprinkle all over with salt and pepper. Heat oil in a frying pan over moderately high heat until hot but not smoking, then brown chicken well ( this step is very important), starting with skin sides down and turning over once, 10-12 minutes total. Transfer chicken to a plate and pour off all but 1 tablespoon fat from the pan.

Add butter, brown sugar, apples and shallots to fat in pan and cook over moderate heat, stirring occasionally, until apples are browned, about 5 minutes.

Add stock, vinegar and sage and deglaze the pan by boiling, stirring and scrapping up any brown bits, 1 minute.

Return chicken, skin sides up, to pan along with any juices accumulated on plate. Reduce heat and simmer, loosely covered with foil, until chicken is cooked through and sauce is slightly reduced. It is really important that you have browned chicken very well in the beginning otherwise you will need to let the chicken cook for far too long. The normal cooking time should be around 25 minutes.

Strawberry Tiramisu

Perhaps the purists will be a bit shocked by the title of this recipe. It is a summery way of presenting tiramisu. I fell for it as I have been avoiding recipes with raw eggs and in a way I could still have some connection with tiramisu but without the eggs.

You could use frozen raspberries but in my book strawberry is just a perfect addition.

It keeps really well as it often lasts for 3 to 4 days in the fridge providing that you cover it with cling film. As a matter of fact the longer it stays in the fridge the more delicious it is as the flavours get more pronounced. If you are having guests for a meal you can prepare it the day before. It doesn’t require much preparation at all. Instead of using Marsala wine any desert wine would be welcome. Once again, if I could just say so, the Marsala is a better combination if using strawberries - in my opinion. The strawberries have to be strained before being added to the dessert otherwise it will be very soggy.

1 ¾ (437 ml) cups single (pouring) cream

500g mascarpone

1 cup (250 ml) Marsala wine

26 sponge finger biscuits

600gm strawberries

Vanilla sugar

Chop the strawberries in small pieces and strain them.

Place the cream in a bowl and whisk until soft peaks form. Fold trough the mascarpone and set aside. Pour the Marsala wine in a in a deep dish and dip the biscuits in the mixture just long enough to dampen them. Layer the base of the dessert dish with half the biscuits. Make a layer of strawberries over the biscuits and then a layer of cream over the strawberries. Repeat all the previous steps, sprinkle with vanilla sugar, cover with cling film and put it in the fridge for at least one hour. The cream will become very firm and make a lovely combination with the soft and moist biscuits plus the sharp strawberries. The longer it stays in the fridge the more delicious it becomes.

Cherry and Pistachio Clafoutis

The recipe asks for black cherries but I could only find the ordinary cherries. I say ordinary because they are found anywhere when in season. I absolutely love cherries. To the point that I can eat until I have stomach pain. Obviously knowing better I exercise self restrain these days.

I have read so much about clafoutis over the last few weeks – traditional cherry clafoutis, strawberry clafoutis..It was hard not to make some. I have to admit not having had any until today so I do not have anything to compare that with. I can, however, say that the end result is delicious. It is a recipe by a famous Australian desert chef called Philipa Sibley. Her recipes are really lovely and they tend to have a lovely twist. I find that the Australians always bring interesting elements to their recipes and I really love the ones I have already tried.

Even though it is recommended that we eat it as soon as we take it out of the oven – which I did, this morning it tasted just divine. Had it with a cup of coffee and no extra cream. I do not often have such thing for dessert but this morning I could not resist.

With regards to the recipe, as I had no ground pistachio I had to use the food processor to grind the ones I had. I processed it with the sugar as opposed to on its own. This way I made sure that all the lovely oils that are released by the pistachio were all captured by the sugar.

500gm black cherries, pitted

40ml kirsch

Clafoutis batter

1 cup thickened cream

2 eggs

3 eggs yolks

100gm caster sugar

70gm ground pistachio

100gm pistachios, coarsely chopped

1 tbsp plain flour

Pouring cream to serve

Combine the cherries and kirsch and stand for 10 minutes, then scatter over the base of a greased and sugared 6 cup-capacity shallow baking dish.

For the batter, combine thickened cream, eggs and egg yolks in a bowl and whisk until smooth. Combine the sugar, ground pistachios, chopped pistachios and flour in a separate bowl, then add cream mixture, stirring to combine. Pour batter over cherries, and bake at 180C / 160o fan assisted oven, for 20 minutes or until puffed and golden (the centre should still be creamy), and serve immediately with pouring cream passed separately.

Sunday, June 04, 2006

Suzy's Cake - Pierre Hermé

After reading so much about Pierre Hermé in different blogs I ordered his Chocolate Desserts book from Amazon. When the book arrived I thought that perhaps I had been a bit premature since it all looked so grand. However, I was wrong; the book is not only beautifully photographed but also has wonderful recipes, nicely explained. I strongly recommend it. Yesterday I decided to make use of it by preparing a recipe for my dinner party to two very dear friends. I ended up choosing this beautiful chocolate cake entitled Suzy’s cake. Suzy is a good friend of Pierre and Frédérick. The cake is a wonderfully moist and terribly delicious chocolate cake. Very easy to prepare - its secret likes in the quality of the chocolate. I laid a very fine layer of batter, and then put fresh raspberries over it before putting the rest of the batter over it. We were unanimous in electing it one of the most wonderful non fussy chocolate cakes we have eaten. We had some vanilla ice cream on the side but I am still to have it with ginger icre cream as Hermé says that it makes a very nice match.

Sharing it with you:

250g bittersweet chocolate, preferably Valrhona Guanaja

250g unsalted butter, at room temperature

200g sugar

4 large eggs at room temperature

70g all-purpose flour

Center a rack in the oven and preheat the oven to 180oC (350oC). Butter a 24-cm (9-inch) round cake pan that is at least 5 cm (2 inches) high, line the bottom with parchment paper, butter the paper, and dust the inside of the pan with flour; tap out the excess and set the pan aside.

Place the chocolate in a heatproof bowl over – not touching – simmering water and heat until the chocolate is melted; or melt the chocolate in a microwave oven. Set the chocolate aside to cool; it should feel only just warm to the touch when you mix it with the rest of the ingredients.

Put the butter and sugar in the bowl of a mixer and beat on medium speed for about 4 minutes, scraping down the sides of the bowl frequently, until the butter is creamy and the sugar well blended into it. Add the eggs one at a time, beating for about 1 minute after each addition. Reduce the mixer speed to low, pour in the cooled chocolate, and mix only until it disappears into the batter. Alternatively, you can fold in the last of the flour with a rubber spatula. You’ll have a thick, smooth, satiny batter that looks like old-fashioned chocolate frosting.

Scrape the batter into the pan, smooth the top, and slide the pan into the oven. Bake for 26 to 29 minutes or until the cake rises slightly and the top has lost its sheen. The top may crack a bit and the cake may not look entirely set in the center; when you test the cake by inserting a slender knife into the center, the knife will come out lightly streaked with batter, which is what you want. Transfer the cake to a rack to cool.

When the cake has cooled, chill it in the refrigerator for an hour or two to make it easy to unmould. Turn the cake out, remove the parchment, and invert the cake onto a serving platter so that it is right side up. Allow the cake to come to room temperature before slicing and serving.

Saturday, May 20, 2006

Mussels Cooked in Coconut Milk

I love mussels. Well, I love most things ‘sea food’. I have a really good fishmongers where I always go to and I buy the mussels already cleaned up. It’s such a treat. Today I went over for vongoli but there was none left so I ended up once again with mussels. Oh, too bad!!

I decided that I would prepare it with coconut milk. Great combination. Plus a selection a ingredients which say ‘thai’ all over. The result was a really lovely dish, with a beautiful aroma. I had 400g all to myself. It is true that once you discount all the shells you are not left with much substance as it were. I don’t care however. It is all so wonderful


1.5 kg fresh mussels

2 fresh lemon grass stalks

1 x 400ml tin of coconut milk

3 tablespoons water

3 kaffir lime leaves or 1 tablespoon shredded lime zest

2 tablespoons coarsely chopped spring onions

1 tablespoon Thai green curry paste

3 tablespoons chopped coriander roots or stalks

2 tablespoons fish sauce (nam pla)

1 teaspoon sugar

A large handful of fresh Thai basil leaves or ordinary basil leaves, shredded

Often the fishmonger sells the mussels already cleaned up. If not, clean them before using in the recipe.

Peel the tough outer layers of the lemon grass stalks, leaving the tender whitish centre. Cut it into 7.5cm pieces and crush with the flat of a heavy knife.

Pour the coconut milk and water into a wok or large frying-pan. Add the lemon grass, lime leaves or zest, spring onions, curry paste, coriander roots or stalks, fish sauce and sugar and bring to a simmer.

Add the mussels, then cover and cook over a high heat for 5 minutes, until all the mussels have opened (discard any that remain closed). Give the mixture a final stir, add the basil leaves and sever at once.

Chicken with Okra

I grew up eating this dish .Not every day obviously but with a certain regularity. In Brazil some people are a bit weary of okra as if not looked after properly it can ‘dribble’. Yes, dribble. That unpleasant, sticky, liquid thing that runs out of one’s mouth when we are a bit tired and doze off unexpectedly. However, if the okra is slightly fried before being thrown into a stew or something like it, it will not ‘dribble’. An American friend once challenged me in front of a lot of people saying that it was not true. That there was no way we could avoid the sticky, unpleasant goo we got when putting okra together with some sort of liquid. Well, I did not spend my evening trying to convince him that he was wrong. After all if some people think that they hold the goblet of truth so be it. I do tell you though that that is the right way to avoid that sticky goo.

I made this lovely recipe by Fran from Flavour which has fried okra as it main ingredient. I told Fran that I would post the Brazilian recipe of okra. So here it is. Sometimes I ate this dish in a sort of stew-style dish but mine is more subdued. If you want more sauce I would dare say that you should add some chicken stock to the chicken as soon as the onions are added.

2 kg chicken breasts cut into medium sized pieces

½ cup vegetable oil

3 big onions, chopped

1 teaspoon of ‘mineiro’ seasoning**

1 kg okra, cut into small round slices

‘Mineiro’ seasoning

500g onions

200g garlic

2 green peppers

1 bunch of parsley (flat leaf)

1 bunch of chives

Put all the ingredients above in a blender. Whiz it with sal to taste and remove it when it reaches paste consistency.

Heat half the oil in a saucepan and throw the chicken in, mixing until it reaches a golden colour and are cooked through. Add the onions and enough ‘mineiro’ seasoning to add flavour to the chicken, cooking in slow heat.

In a separate pan heat the remaining oil and throw the okra in. Mix it all the time until it is fried. When ready remove from the pan and put on a plate with some kitchen towel on it.

When the chicken is nearly ready throw the okra in and let it cook for a bit longer.

Serve it outright.

In Brazil we serve it with something similar to polenta.The Portuguese name is ‘Angu’ and its ingredients are cornflour and water. I have never been a big fan of angu anyway so I eat it with rice.

Beautiful Carrot and Peanut Salad


I remember the first time I came across this salad. It was in Nigella’s Forever Summer book. Carrots are such beautiful looking things. Fell in love and said to myself ‘must give it a go’. The recipe is originally entitled ‘The Rainbow Room’s Carrot and Peanut Salad’ in case you look for it. In the book you can read about the recipe and its place in Nigella’s life. I won’t go into that. I just love the simplicity of its ingredients, its crunchiness – there is an awful lot of chewing there, the amazing taste and texture that the peanuts add to it in conjunction with the carrots. If you like it a repeat will be no trouble. The red wine vinegar in the sauce might sound a bit strange but go beyond the initial reaction as it plays an important role in the lovely end-result.

One thing that I want to recommend is that the carrots are grated coarsely or that you cut them in chopstick thickness. I believe very strongly that this salad doesn’t work well if you just grate the carrots finely as a lot of the texture will be gone.

4 medium carrots peeled and coarsely grated or cut into chopstick shape

75g salted peanuts

2 tablespoons red wine vinegar

2 tablespoons groundnut oil

Few drops sesame oil


Throw the carrots in a salad dish followed by the peanuts and give it a good mix. In a separate container add the vinegar, groundnut and sesame oil. Pour it over the salad and just have a good time chewing away. Crunch, crunch…

Monday, May 15, 2006

Passion Fruit, poppy seeds and almond cake


This is a lovely and pretty looking cake. Wonderful for afternoon tea. I never have time for a nice afternoon tea session during the week as I am at work. The max I do is grab a cup of Earl Grey tea from the cafeteria. If I’m lucky I might be able to pinch a Digestive from one of my colleagues. So I have an obsession with setting up lovely afternoon tea sessions. In my dream afternoon tea land I chose this cake to have with a cup of Breakfast tea – I know it is afternoon

When I originally saw the amount of poppy seeds required I suspected that there might have been a typo. It turned out to be just right as they will dot the cake in a very charming way. Fancy a slice?


6 tablespoons of poppy seeds

¼ cup of milk (60ml)

180g butter, room temperature and softened

180g caster sugar

3 large eggs

240g plain flour

½ cup flaked almond

½ cup passion fruit juice, strained through a sieve (120ml)

1 tablespoon baking powder

Icing:

90g caster sugar

160ml passion fruit juice

80ml water

Grease and flour a 22.5 cm wide bundt pan. Reserve.

Pre-heat the oven – 180oC. Put the poppy seeds in a small bowl and cover them with the milk. Leave it for 20 minutes.

Put the butter and sugar in a bowl and beat it until the mixture is pale and creamy. Add the eggs, one at a time, beating well after each addition. Fold in the almonds and the poppy seeds with milk. Then add the flour and passion fruit juice intercalating them. Add the baking powder last.

Put the mixture in the prepared baking tin and bake for approximately 35 minutes. Let it cool in the tin for approximately 5 minutes before removing it from the tin.

In the meantime prepare the icing by mixing the sugar and passion fruit juice and then gradually adding the water until you reach the desired consistency. Pour over the cake whilst it is still hot/warm.

Saturday, May 06, 2006

Rosewater Madeleines


Sometimes I bake to relax, to stop my mind from spinning round full of thoughts. Flicking through some of my books I came across a recipe that truly got me curious: madeleines with rosewater. Madeleines are such lovely, gentle creations anyway. I like calling them sponge biscuits. The rosewater seemed such a wonderful touch. That made my mind for me. I tried to imagine how I would have felt if I had been served them with tea. And the thought filled me with warmth. There is something about rose water and what it invokes. The danger is that I can never stop eating madeleines when I make them. There is a lot of self-restrain that needs to be exercised.Oh well, life is tough sometimes.

With regards to the recipe, I followed it to the letter. I would like to say that the tablespoon of melted butter to grease the tin seemed a bit much. I had loads left out. I also recommend that you do not fill the tins to the top as the madeleines rise quite significantly.

If you want to recreate them here’s the recipe and steps to follow:

50g unsalted butter, plus 1 tablespoon for greasing

1 large egg

40g caster sugar

Pinch of salt

45g plain flour, preferably Italian 00

1 tablespoon rosewater

Icing sugar for dusting

24-bun mini-madeleine tin

Melt all the butter over a low heat, then leave to cool. Beat the eggs, caster sugar and salt in a bowl for about 5 minutes, preferably with an electric mixer of some sort, until it’s as thick as mayonnaise. Then sprinkle in the flour; you can use a sieve above the egg and sugar mixture, put the flour in and then shake it through. Fold in the flour with a wooden spoon and then set aside a scant tablespoon of the cold, melted butter for greasing the tins and fold in the rest along with the rosewater. Mix well, but not too vigorously. Leave to rest in the fridge for 1 hour, then take out and leave at room temperature for half an hour. Pre-heat the oven to 220oC/ gas mark 7.

Brush the insides of the madeleine tins with the butter set aside before filling them with the mixture. It should be about 1 teaspoon for each mould – not full by any means. Bake for 5 minutes, though check after 3. When ready turn out and let cool on a rack, then arrange on a plate and dust with icing sugar.

Makes about 48.

Tuesday, May 02, 2006

Cloverleaf Honey-Wheat Rolls

I have made this recipe so many times - which is something that I am not very used to doing. I often do not get a chance to repeat a certain recipe as I tend to be in look out for new recipes most of the time. However these rolls are so delicious and pretty easy to make. Always a sure winner. I love them with soup or just buttered whilst still hot. This time round I used spelt flour instead of whole wheat flour. I was pretty happy with the result. The rolls were so deliciously soft. also decided to sprinkle half of them with poppy seed after glazing them with a mixture of single cream and water - as opposed to the egg wash suggested in the recipe. Apart from that I pretty much stick to the original. I got the recipe from Anna who has the blog Kitchenspace. Click here to see the original post with the recipe and Anna's comments.

Monday, May 01, 2006

Fried Okra


I grew up eating okra/lady fingers but always in stews. Never fried. When I read a post in Flavors where Fran tells us about these fried okras I thought to myself, ‘I have to try it’. I just get curious about different ways of preparing things. From when I read the post to when I finally got round to preparing the dish it was quite some time. However, it was worth the wait. Even though I did not have enough cornmeal lying around in order to coat my okra well enough as I saw that Fran did, it still turned out great. It is a completely different texture from the one I was used to, and the crunchiness is great. I also particularly liked the combination of flavours: the tomato, the peppers, the spring onions and the bacon. I had the dish all to myself – I made 125g. Hands up, guilty of gluttony. Please click here for the original recipe from Fran.

And Fran, a big thank you for the recipe. I have already passed them on to a few fellow Brazilians who like me had not eaten fried okra before.

Chocolate Raspberry Pavlova


Up to quite recently you wouldn’t catch me preparing Pavlova in a million years. I remember kiwis and Aussie mates of mine arguing about which country had come up with palvlovas but could not understand what the fuss was all about. I was flicking through a Nigella’s cookery book in search of a nice desert to make for a good friend and thought that the look of this Chocolate Raspberry Pavlova was just stunning. From where I was standing all those gorgeous contrasting colours made even me want to take a bite. It was not like the ordinary Pavlovas I had seen before, with their pale look. This one had the dark of the chocolaty base, the white of the cream and the red of the berries. Winner combination of colours. I have to admit to have even taken great pleasure out of eating it – it is crunchy on the outside but slightly soft in the inside and very chocolaty. To top it all up you have the softness and slight tanginess of the raspberries which break a bit with the sweetness of the dessert. I was really please with the outcome.

For the chocolate meringue base:

6 egg whites

300g caster sugar

3 tablespoons cocoa powder, sieved

1 teaspoon balsamic vinegar or red wine vinegar

50g dark chocolate finely chopped

For the topping:

500ml double cream

500g raspberries

2-3 tablespoons coarsely grated dark chocolate

Pre-heat the oven to 180oC/gas mark 4 and line the baking tray with baking parchment.

Beat the egg whites until satiny peaks form, and then beat in the sugar a spoonful at a time until the meringue is stiff and shiny. Sprinkle over the cocoa and vinegar, and the chopped chocolate. Then gently fold everything until the cocoa is thoroughly mixed in. Mound on to a baking sheet in a fat circle, approximately 23cm in diameter, smoothing the sides and top a bit. Place in the oven, then immediately turn the temperature down to 150oC/gas mark 2 and cook for about one to one and a quarter hours. When it is ready it should look crisp around the edges, slightly cracked in parts, and dry on top, but when you prod the centre you should feel the promise of squidginess beneath your fingers. Turn off the oven and open the door slightly, and let the chocolate meringue disc cool completely.

When you are ready to serve, invert on to a big, flat-bottomed plate. Whisk the cream till thick but still soft and pile it on top of the meringue, then scatter over the raspberries. Coarsely grate the chocolate - I used a vegetable peeler to get some thin strands.

Sunday, April 30, 2006

Chickpeas with Pomegranate Molasses


I am a very big fan of chickpeas. There is something about them that makes me eat non-stop. It’s horrendous. I can easily eat 400g in one sitting. I have, however, been working really hard on my self-control. I now restrict myself to eating them socially. It was in my social mission of sharing chickpeas with my dear friends that I prepared this wonderful recipe. It has a strong North African influence.

The recipe is from the Casa Moro The Second Book. If you are not familiar with this book I recommend that you borrow it from your local library and have a browse. The influence is from the cuisine of South Spain and North Africa. Having been to their restaurant in London I became an even bigger fan of theirs.

Back to the recipe:


450g home-cooked chickpeas (200g dry weight) or 2 x 400g cans cooked chickpeas, drained and rinsed

4 tablespoons olive oil

3 garlic cloves, thinly sliced

3 tablespoons Pomegranate Molasses ( I bought mine in a Morocan store - I also have a recipe for home made molasse ; let mek now if you would like that)

200ml cold water or a mixture of chickpeas liquor and water

About 60 threads saffron, infused in 4 tablespoons boiling water

3 tablespoons roughly chopped fresh coriander

Seeds of 1 pomegranate

Sea salt and black pepper (I used cumin instead)


Place a large saucepan over a medium heat and add the olive oil. When hot but not smoking, add the garlic and fry until nutty brown. Now add the drained chickpeas, pomegranate molasses, water and saffron infusion and simmer for 10 minutes. Stir in coriander and season with salt and pepper. Finally, sprinkle in the pomegranate seeds. Taste and serve with fish or on its own as part of a selection of mezze. It goes really well with toasted pita bread.