Sunday, March 26, 2006

Three Cheese Tart

Another lovely little recipe from issue 5 of the Donna Hay magazine. It kept tickling me for a while and I finally gave in and prepared it. It tastes really lovely. The recipe says ‘eat cold or hot’. Personally I prefer it hot. Lovely with a beautiful green salad.

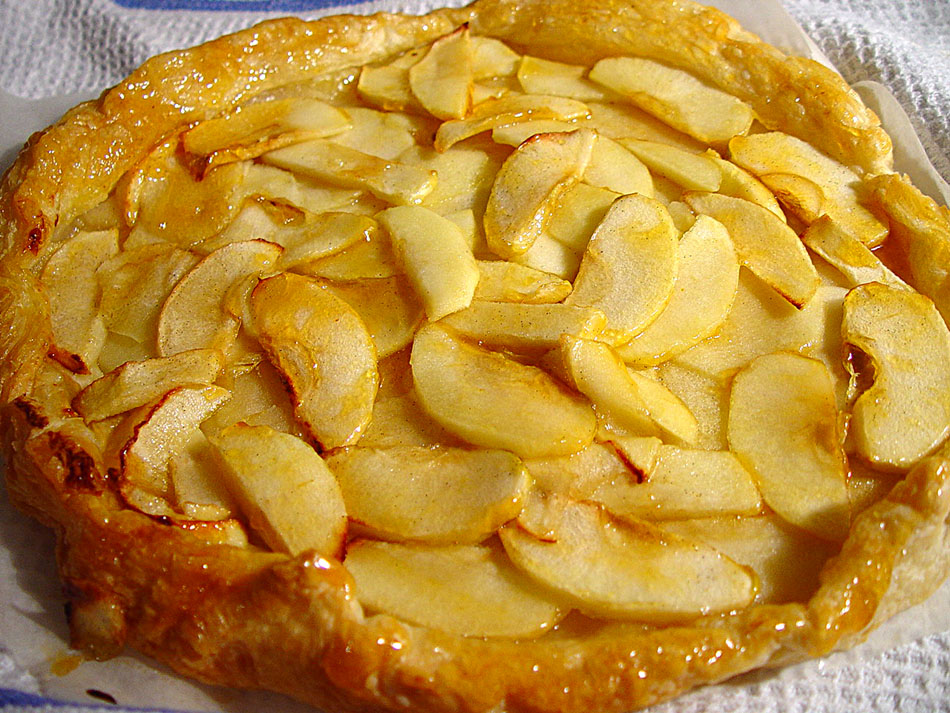
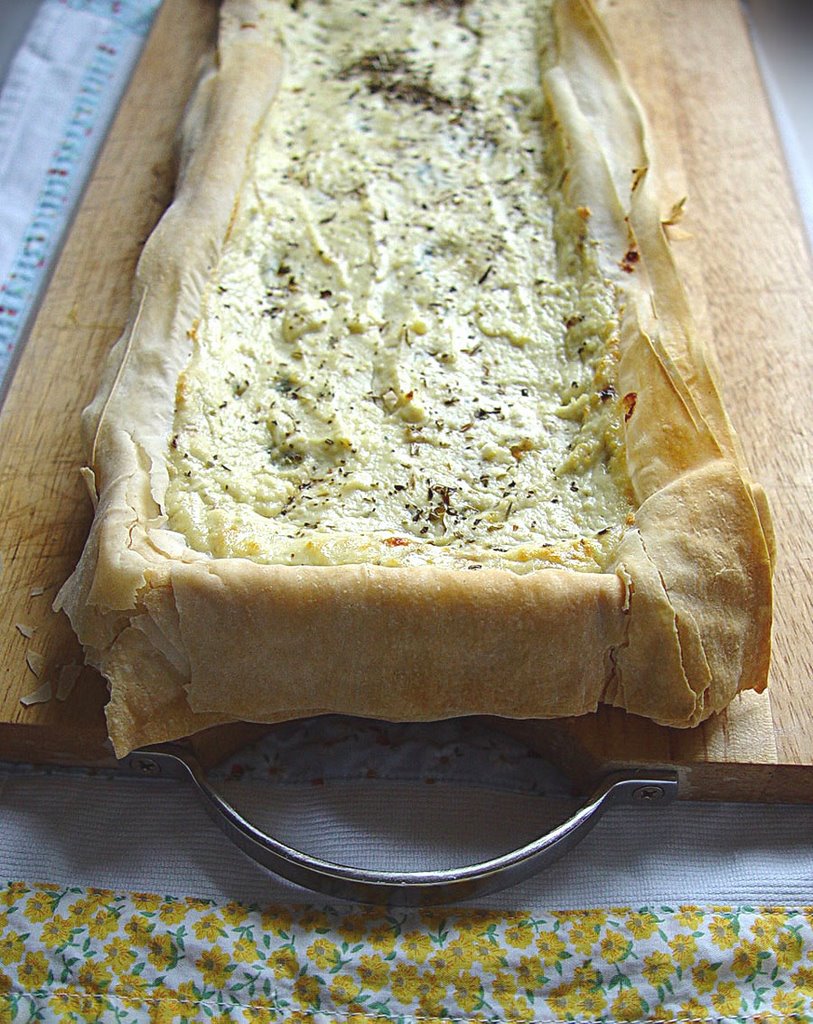
It is pretty quick to put together. You could even say that the most laborious bit is the buttering of the filo. When you put it on the table it looks really pretty which is also nice as I am a firm believer in that eating starts with the eyes.

8 sheets filo pastry

60g butter melted

Filling

500g fresh ricotta cheese

2 eggs

½ cup finely grated parmesan cheese

100g mild blue vein cheese, finely chopped

1 tablespoon oregano leaves

Sea salt and cracked black pepper


Rectangular tart tin with removable base – 11 cm x 34 cm


Preheat the oven to 180oC/ 160o fan/ 350oF. Brush a sheet of filo with melted butter. Top with another sheet and brush with more butter. Repeat with the remaining sheets and butter. Place the pastry into the tart tin and trim any excess.

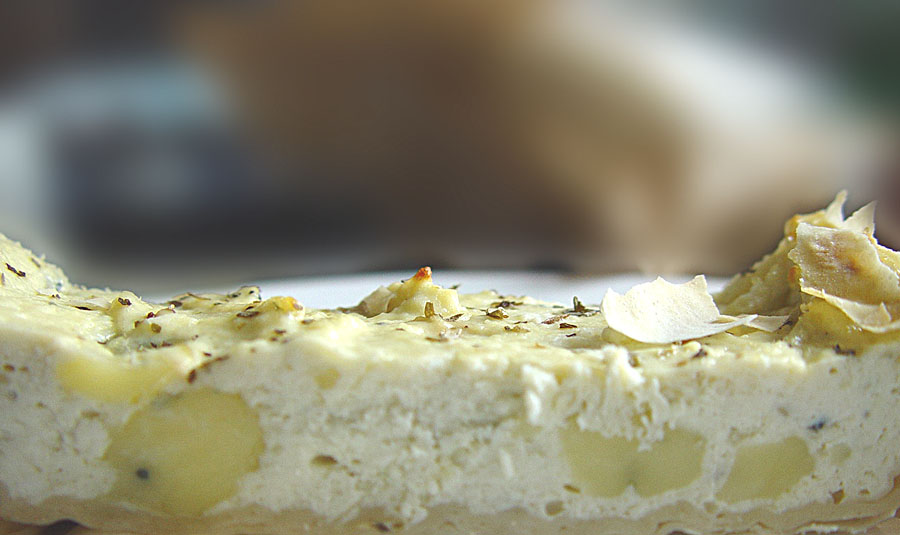
To make the filling, combine the ricotta, eggs, parmesan, blue vein cheese, oregano, salt and pepper in a bowl. Spoon into the pastry shell and bake for 30 minutes or until the filling is set and golden. Serve warm or cold. Serves 6.

Flat Apple and Vanilla Pie

This recipe was in the cover of the Good Food magazine, Oct 2005 issue. I am somehow fascinated by cooked desserts with apples. This one was just irresistible. It is also dead simple and quick to prepare. Providing that you have some puff pastry sitting around in your fridge you can prepare it in no time. Be it a treat to an unexpected guest or to yourself and your family. I can see it going really well with a dollop of Greek yoghurt, or cream fraîche or ice cream. You get the crunchiness of the tart and the creaminess of the latter.

375g pack puff pastry, preferably all-butter

5 large eating apples

Juice of 1 lemon

25g of butter, cut into small pieces

3 tsp vanilla sugar or 1 tsp vanilla extract

1 tbsp caster sugar

3 rounded tbsp apricot conserve

Heat oven to 220oC/180oC fan/gas 7. Roll out the pastry and trim to a round about 35cm across Transfer to a baking sheet lined with parchment paper. Peel, core and thinly slice the apples and toss them in the lemon juice. Spread over the pastry to within 2cm of the edges. Curl up the edges slightly to stop the juices running off.

Dot the top with the butter and sprinkle with vanilla and caster sugar. Bake for 15-20mins until the apples are tender and the pastry crisp.

Warm the conserve and brush over the apples and pastry edge. Serve it hot

Sunday, March 19, 2006

Soft-centred chocolate puddings

This is a great recipe. So practical and delicious too. I decided to make it at the last minute and as the recipe is not too laborious it was no trouble. The result is a lovely pudding that is moist inside and so chocolatey.very yummy. I served it with strawberries to break the sweetness of the desert. Plain yoghurt is also a lovely combination or crème fraîche even. I got the recipe out of Bill Granger’s Bills Open Kitchen book. I always go for his books if I want last minute treats. And I have to say that I am very rarely disappointed with the outcome.

200g good quality dark chocolate, chopped

100g unsalted butter, chopped

3 eggs, lightly beaten

115g caster sugar

2 tablespoons plain flour

To serve

Thick (double/heavy) cream, strawberries, crème fraîche

Preheat the oven to 200oC (400oC/Gas mark 4). Place the chocolate and butter in a heatproof bowl over a saucepan of simmering water, making sure the bowl does not touch the water, and stir until just melted.

Place the eggs, sugar and flour in a bowl and mix until just combined. Gradually mix in the chocolate mixture. Pour the mixture into four 250ml ovenproof ramekins and place on a baking tray. Bake until the edges are set, about 15 minutes. Serve with cream or crème fraîche plus strawberries or other berries.

Chocolate Cookies


The original recipe was taken from Culinary in the Desert, the wonderful and inspiring blog by Joe. The recipe is called ‘Chocolate Pretzel Cookies’. I couldn’t bake the cookies on the day I prepared the dough and it sat in the fridge for a few days until I was finally able to bake them. I can assure you that the dough keeps beautifully in case you want to get it done in advance. Why didn’t I make the original pretzel shaped cookies? Laziness. I know, it’s not something to be proud of. However, it is good to know that there are different ways of baking these cookies. They are truly lovely and reminded me a lot of Orio cookies. A friend who was here when I baked them mentioned that they reminded her of these cookies we have back in Brazil called Negrescos. They are related to Orios.

½ cup icing sugar

12 tablespoons unsalted butter, softned

½ teaspoon salt

1 ½ teaspoons good quality vanilla extract

¼ cup unsweetened good quality chocolate powder

1 ¼ cups plain flour

Egg wash

1 egg white

1 tablespoon water

In a medium mixing bowl, cream butter and icing sugar until light and fluffy. Beat in salt and vanilla. Mix in the flour and cocoa until everything is combined. Wrap dough in some plastic wrap and flatten it to a disk. Set in the refrigerator for at least 1-2 hours.

Preheat the oven to 180oC gas oven/160oC fan assisted oven/ 350oC/gas mark 4.

Take table tennis ball sized pieces of dough from the disk. Shape each dough piece into a 10” long rope and form the ropes into a pretzel shape and set on parchment lined baking sheet. If you would rather have cookies just shape them to your preference and line them on the lined baking sheet.

In a small bowl, whisk egg white an water together until foamy. Brush each cookie with egg white glaze and sprinkle coarse with white sugar on the top. Bake for 10-12 minutes, until the cookies are firm. Transfer to a wire rack to cook completely. Makes about 24.


More cookies

Thursday, March 16, 2006

Blueberry muffins


Muffins are a passion of mine. I love giving them to friends as well as eating them of course. This is a lovely recipe which is not very sweet, just about right. Each muffin is filled with blueberries, and terribly moist. Pure goodness. If I am up for an early start I will prepare the dry ingredients and put them in a bowl the night before. As I wake up I only turn the oven on, melt the butter and mix all the liquid ingredients. By the time the oven is ready I just mix dry and wet, pour in the muffin cases …and we have lovely muffins within 20 minutes.

75g unsalted butter

200g plain flour

½ teaspoon bicarbonate of soda

2 teaspoons baking powder

75g caster sugar

Pinch of salt

200ml buttermilk (or 100g yogurt and 100ml semi skimmed milk)

1 large egg

200g blueberries

Muffin tray


Pre-heat the oven to 200oC gas/180oC fan/gas mark 6. Prepare the muffin tray with 12 paper cases.

Combine all the dry ingredients in one bowl. Melt the butter and let it cool. In the meantime put the egg and buttermilk in a separate bowl.When the butter is cool add it to the wet ingredients and beat it all up. Make a well in the centre of the bowl with the dry ingredients and pour the wet one. Mix it al with a fork so that the mixture stays lumpy. Fold the blueberries in and mix it just gently. Spoon the mixture in the muffin tins and leave it in the oven for 20 minutes approximately.

Wednesday, March 15, 2006

Pasta with Chilli and Bacon


Mid week, long day in the office, it is great to get home and to be able to knock something out that will be rushed but nice. This is a very quick recipe to prepare but nonetheless really lovely. Up to the moment right before you add the mascarpone it looks like any other pasta dish. The mascarpone adds creaminess. Really lovely. During the week I use a lot of dried pasta as there is not much time to prepare my own. If you have your own homemade pasta just adjust the cooking time.

450g spaghetti

1 tablespoon olive oil

2 red chillies, seeded and chopped

6 rashers of bacon, rind removed, chopped

¾ cup mascarpone

½ cup shredded fresh basil

Cracked black pepper

Parmesan cheese to serve

Boil the pasta according to the instructions in the packet. While the pasta is cooking, heat frying pan over medium high heat. Add the olive oil, chillies and bacon and cook for another 4 minutes, until the bacon is crisp.

Drain the pasta and return it to the hot saucepan. Place over low heat and add the chilli and bacon mixture together with the mascarpone, basil and pepper. Mix to combine. Serve with grated parmesan cheese.

Sunday, March 12, 2006

Raspberry and pistachio cake


This cake is just like the ones I like: practical, quick to prepare and delicious. The buttermilk makes the cake very moist. When you take a bite you have a very fluffy and moist cake, with a fabulous tangy taste of the raspberries and the crunchiness of the pistachio. Soooooo good. You can omit the icing if you just want to have a nice, straight forward cake. I got this recipe from Donna Hay magazine, issue 5.

125g unsalted butter, softened

280g sugar

2 teaspoons finely grated orange rind

2 eggs

250g plain flour

2 ½ teaspoons baking powder

250ml buttermilk

1 cup frozen raspberries

½ cup chopped pistachios

Icing

1 cup icing sugar sifted

2 tablespoons fresh orange juice

Pre-heat the oven to 180oC/350oF/160o fan assisted oven. Line a 9 x 23 cm loaf tin with a non stick baking paper.

Place the butter, sugar and orange rind in the bowl of an electric mixer and beat for 6 minutes or until light and creamy. Add the eggs and beat well. Fold through the flour, baking powder and buttermilk. Gently fold through the raspberries and pistachios.

Spoon the mixture in the prepared pan and bake for 55 minutes or until cooked when tested with a skewer. Allow to cool in the tin for 5 minutes, and then turn out onto a wire rack.

To make the icing, mix the sugar and orange juice until smooth, then drizzle over the cooled cake.

Victoria Sponge with Raspberry Icing


I made this recipe thinking of my neighbour’s little girl. I think that this is a child’s type of cake, the colours, and the dream like look. The wonderful thing about baking for children is that they show straight away whether they like it or not. I chose the icing with the fruit for colouring as well as flavour because I am not too keen on artificial food colouring.

I recommend you bake it when you have children around or for when you fancy a girly tea session with loads of sweet treats and no guilt. This is a cake to have fun with. The sponge is really delicious and I felt like a little girl as I tucked into the layers of naughtiness.

200g self-raising flour

1 teaspoon baking powder

4 eggs lightly beaten

200g butter, softened

200g sugar

2 tablespoons milk, room temperature

Pre-heat the oven to a temperature of 190oC. Grease two 17.5cm tins and line the bottom with parchment paper. Put all the ingredients in a bowl and beat them until a soft mixture is achieved.

Divide the mixture equally amongst the two prepared tins. Smooth the top and bake in the middle shelf for approximately 20 min. Let it cool in the tin form approximately 10min.

Icing:

190g sugar

190g unsalted butter, softened

100g raspberries

In a bowl, beat the butter and icing sugar together until creamy. In a separate bowl sieve the raspberries. Incorporate the sieved raspberries to the butter and icing sugar mixture and mix well until the colour has changed – you can add it gradually until you achieve the colour you like.


Place one of the cakes on a stand and spread the icing thickly over it. I also threw the pulp over the icing so that there was no waste. Place the other half of the cake on top and dust it with icing sugar. To finish it off put raspberries on top and serve straight away.


Spiced Beef with couscous and a salad of cucumber, tomato and onion

This is a lovely meal that can be put together very quickly. It is recommended for when either you don’t have loads of time or are too hungry to wait for too long till dinner/lunch is ready. The meat has a lovely taste of cumin and coriander and it goes really well with the couscous. The three minutes are recommended if you like rare beef. For medium I suggest 4 minutes, and 5 if well done. The lovely salad adds a bit of colour to the dish as well as goodness. You can add some chopped chilli to the salad if you would like to give it a bit of a kick.

750g rum steak, trimmed

1 teaspoon each ground cumin and coriander

Oil for greasing

For the sambal:

1 tomato, finely chopped

1 cucumber, finely chopped

½ red onion, finely chopped

1 tablespoon olive oil extra-virgen

2 teaspoons lime juice

Sal and pepper

For the couscous:

2 cups of vegetable stock

2 cups couscous

20g butter

3 green onions, finely chopped

Prepare the salad: combine the tomato, cucumber, onion, oil and lime juice. Mix well and season to taste with salt and pepper.

Prepare the couscous: prepare the stock mixing it with boiling water. Place couscous in a heatproof bowl and pour the hot stock over the couscous. Cover the dish with a clean tea towel and leave it to rest for 5 minutes. Stir with a fork to separate the grains, and then stir in butter and green onions. Adjust the seasoning if necessary.

Sprinkle steak with combined cumin and coriander. Cook in a deep frying pan over high heat for 3 minutes on each side.

Arrange the steak, couscous and salad on a plate and serve.

Saturday, March 11, 2006

Chickpea, Feta & Coriander Salad


Falling Cloudberries by Tessa Kiros is one of those books that have inspired me immensely since I bought it. I keep going back to it over and over again, and always find loads of things that I want to prepare. That’s where I came across this recipe.

I have to admit that my first attraction when I saw it was the word ‘chickpea’. I have a long love affair with chickpeas, and have been known to eating them straight out of a tin. Eating so many to the point of feeling unwell. For many years I would eat them always cooked in stews or in hummus. More recently I have been desperately looking for all sorts of recipes for chickpeas. In this recipe the feta adds a lovely creamy element to the salad, and in my opinion it goes awfully well with the chickpeas. I have made it with and without the coriander and both versions are lovely. I know that many people find coriander too overpowering so don’t be afraid to prepare it without the coriander as you will still have all the lovely flavours. The same can be said for the chillies – they are an optional element.

  • 250g dried chickpeas(without skins if possible), soaked overnight in cold water; or 400g tinned chickpeas
  • 250ml olive oil
  • 1 large red onion, chopped
  • 5 garlic cloves, very finely chopped
  • 1 or 2 red chillies, seeded and finely chopped
  • 250g crumbled feta cheese
  • 4 spring onions, green part only, chopped
  • 25g chopped coriander
  • 30g chopped flat-leaf parsley
  • Juice of 1 lemon

If using dried chickpeas, rinse them and put them in a saucepan, covered with loads of water. Bring to the boil. Lower the heat slightly and cook for 1-1 ½ hours, until they are soft but not falling apart. Add the salt towards the end of the cooking. When cooled, drain them and put the chickpeas in a large bowl, removing all the skin. If using tinned chickpeas, drain and rinse them before transferring to a bowl.

Heat 3 tablespoons of the olive oil and fry the red onion gently until it is cooked through and lightly golden Add the garlic and chilli and cook for a few more seconds until you can smell the garlic. Take care not to brown the garlic. Leave to cool completely.

Add the feta, spring onion, coriander, parsley and lemon juice to the chickpeas and season with pepper and dash more salt, if needed. Add the cooled garlic oil and the remaining olive oil and mix through very well.

Sunday, March 05, 2006

Green Beans and Aubergine with chilli and lime

Another aubergine recipe.This time with an oriental touch to it. It is a very quick and straight forward dish. At the same time it offers a variation to the usual aubergine recipe. It is nice to have with pan fried pork or prawns. I have also had it as a main – just by doubling up the portion. I am on a Donna Hay phase and this recipe is also from one of her magazines.

1 tablespoon peanut oil

1 long red chilli, seeded and chopped

150g green beans, trimmed

4 slender aubergines (350g), sliced diagonally

½ cup coconut milk (120ml)

1 tablespoon lime juice

2 teaspoons fish sauce

2 tablespoons chopped coriander

Heat the oil in a wok over medium heat. Add the chilli, beans and aubergines and stir-fry for 3 minutes or until just tender. Add the coconut milk, fish sauce and lime juice. Simmer for 3-4 minutes. Serve sprinkled with coriander.


Baby apple upside-down cakes


The original recipe is in a Donna Hay magazine, issue 2. When I first made it I felt quite disappointed with the result as it was rather bland. Nothing special about it really. Apart from the apple slice on top there was nothing fruity about it at all. As I really like cakes with apple I thought that perhaps I could jazz it up a little bit. I then came up with the idea of adding the chopped apples and the cinnamon. The little cakes were revided. The chopped apples added needed moisture, and the cinnamon..well, to me there is no apple cake without a touch of cinnamon. The result is this lovely little cake, moist and very pretty. Delicious with a cup of tea. I hope you enjoy it as well.

12 teaspoons golden syrup/honey

2 small Pink Lady apples, each cut into 6, 1cm slices

100g caster sugar

3 eggs

1 teaspoon vanilla extract

160g self-raising flour

1 teaspoon cinnamon powder

1 teaspoon baking powder

120g unsalted butter, melted and cooled

1 cup chopped apple

Pre-heat the oven to 180oC. Place 1 full teaspoon of golden syrup in the base of 12 greased ½ cup capacity non-stick muffin tins. Place an apple slice on top of the golden syrup. Trim the slices to fit if necessary.

To make the cake, beat the sugar, eggs and vanilla using an electric mixer for 4-5 minutes or until thick and pale. Fold in the sifted flour, cinnamon and baking powder, and melted butter, until just combined. Throw in the chopped apples and mix just to incorporate the apples. Spoon the mixture over the apple in the tin only up to ¾ of the full measure. Bake for 18-20 minutes or until golden. Cool for 10 minutes before removing it from the tin.

Don’t worry if the apple stays in the bottom of the pan. Just place it on top of the cake. Spoon the syrup which remains in the bottom of the tin over the apple to drizzle the cake. It goes well with thick cream or vanilla ice cream.

Basic Cookie Recipe

Cookies are always a nice gift for someone. They tend to please kids and grown ups alike. Reading one of the Donna Hay magazines I have, issue 10, I came across this fun article: RollScoopCut – one cookie dough three ways. I choose to start by the roll and use jam as filling. I had never eaten or seen cookies with a filling of jam before.

The dough is pretty cool. I prepared it at night and ended up leaving it in the fridge over night as I just felt too tired before it baking time. When I finally got to preparing it the following day I only made half of it and the other half remained in the fridge for an extra day.

Now, I always recommend/prefer baking goods straight away. However, I found it very comforting to find out that when unexpected circumstances prevented me from baking my cookies straight away I still came across I nice dough a couple of days later. It is good in case we need some forward preparation.

250g butter, softened

168g sugar

2 teaspoons vanilla extract

1 egg yolk

281 g plain flour, sifted

Place the butter and sugar in the bowl of an electric mixer and beat until pale and creamy. Add the vanilla and egg yolk and beat to combine. Beat in the flour until a smooth dough forms. Press the dough into a 20 x 30cm (8 x 12 in) tin lined with non stick baking paper and smooth the surface with your fingers. Spread with 2 ½ tablespoons jam of your preference and roll up lengthwise. Wrap in plastic wrap and place in the fridge for 45 minutes or until firm.

Meanwhile pre-heat the oven to 180oC (3500F). Remove the dough from the oven and slice into medium slices (not too thin) and place on baking trays lined with non-stick baking paper. Remember to leave enough space between each cookie as they spread a bit. Bake for approximately 15-18 minutes or until light golden. Cool on a wire rack.

Saturday, March 04, 2006

Tagliatele with tuna and crisp spiced crumbs


My weekdays are often quite rushed; I spend most of my time on the train to and back from London and at work. I do make a point of preparing my own food. I love to cook things I like or even just things that I would like to try. Whenever I happen to be far too tired or unwell and need resorting to the local shops for my food it is always a lot of money spent in something not as satisfying. I end up quite upset about it. Back to the recipe, I tend to go for pasta as a main meal dish during the week because a) I love pasta, b) its versatility is a great ally in my weekly quest for eating well as I can use different sauces and mixtures, c) often it is filling enough to be a ‘all-in-one’ meal..

This recipe attracted me because of the breadcrumb element. I would not have thought of using pasta and breadcrumb in one single recipe as it would have seemed to dry and unattractive. However, even though I was not hit on the head, the spicy element of the recipe made me give it a go. And how surprised was I at the result. It was different in that there were some unusual textures that fascinated me. Plus the flavours. Put aside your prejudices if you can and give it a go. It is worth it. The recipe was taken from a Donna Hay magazine, issue 10.\

200g tagliatelle

1 tablespoon olive oil

1 cup coarse fresh breadcrumbs

1 clove garlic, crushed

1 long red chilli, deseeded and chopped

1 tablespoon finely grated lemon rind

1 tablespoon olive oil, extra

2 courgettes, peeled into strips

1 x 185g can tuna in oil, drained

2 tablespoons black olives

½ cup rocket

¼ cup lemon juice

Sea salt and cracked black pepper

Cook the pasta in a large saucepan of salted boiling water until al dente. Drain and return to the saucepan to keep warm. While the pasta is cooking, heat the oil in a frying pan over medium heat. Add the breadcrumbs, garlic, chilli and lemon rind and cook for 2-3 minutes, stirring occasionally, or until crisp and golden. Set aside. Heat a frying pan over medium heat. Add the extra oil and courgette and cook for 2 minutes or until just tender. Toss half the breadcrumb mixture, courgette, tuna, olives, rocket, lemon juice, salt and pepper through the pasta. To serve, sprinkle with the remaining breadcrumb mixture.

Wednesday, March 01, 2006

Panzanella


I remember the first time I saw this salad. I found it ‘interesting’. Nowadays I also add practical, down to earth and yummy to its description. Its ingredients are mostly things that we have in our fridge most days. Well, apart from the capers of course. They complement each other beautifully. Often we catch ourselves searching for sophisticated ingredients whereas fresh, every day items could equally provide us with a lovely result.

Even though great results are achieved when we leave the salad in the fridge overnight, we can easily prepare it with reduced marinating time.

1 small loaf of country-style bread (about 2-3 days old), cut into large cubes

1 small cucumber, roughly chopped

1 large onion , roughly chopped

3 very ripe tomatoes, roughly chopped

5 tablespoons extra virgin olive oil

3 tablespoons red wine vinegar

2 tablespoons capers, rinsed and drained

1-2 teaspoons sugar

12 basil leaves, roughly chopped

Sea salt and freshly ground black pepper

Place the cucumber, red onion and tomatoes in a large bowl and add the bread. Mix well with your hands and season with salt and pepper.

Whisk the olive oil, red wine vinegar, capers, sugar and some salt and pepper together and add to the bowl with the basil. Give it a good stir, then cover and leave it in the fridge overnight for the flavours to mellow. The bread should feel moist but not soggy .

Serve as a starter or salad, or with grilled or roasted meat.